Back to TheWorxHub for Senior Living Main Menu
Adding Inventory Items
You can add Inventory items to your WorxHub account to associate to work orders.
Watch the Video Tutorial:

How to Add Inventory Items
To add a new Inventory Item:
- Click Add at the top of your screen, then select Inventory Item.
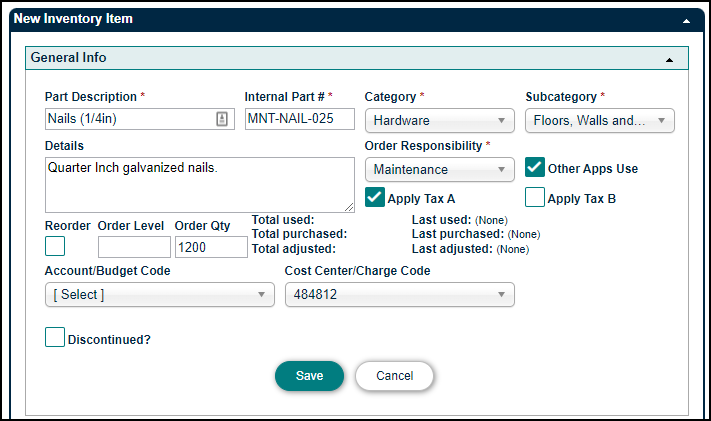
General Info
- Enter a Part Description. This will serve as the identifier in the list of all inventory items.
- Enter an Internal Part #.
- Select a Category and Subcategory from the pick lists.
- Select an Application from the Order Responsibility drop down menu.
- Enter any additional information needed in the Details field.
- If you would like the system to keep track of items that need to be reordered, check the box underneath Reorder.
- Enter an Order Level. This is the threshold below which TheWorxHub will identify this item as needing to be reordered.
- Enter an Order Qty to tell TheWorxHub how many units should be ordered at a time.
- If applicable, select the Account/Budget Code associated with this item from the pick list.
- If applicable, select the Cost Center/Charge Code associated with this item from the pick list.
- Click Save.
Storage Location
- Once you click Save, you can begin entering storage and quantity information for the inventory item by clicking Add storage location.
- In the pop-up window, use the Storage Location search field to either type and select the name of the location, or click the Location Picker (
 ) to select the appropriate location from the list.
NOTE Only assign and consume inventory items to work orders that have Storage Location(s) with Quantity. Otherwise, this will impact your Quantity on Hand.
If there are additional storage areas you would like to add, you can do so by adding them to the Bin/Shelf pick list under your pick list settings.
- Select the applicable Bin/Shelf from the pick list, then click Save.
- Click the Adjust link to the right of the Storage Location record to open the Adjust Inventory pop-up window.
- Enter the current on-hand quantity in the New On Hand field, and type a Reason for Quantity Adjustment, such as "Initial On Hand Count".
- Enter the part cost in the New Unit Cost field, and type a Reason for Value Adjustment, such as "Initial Price Listing".
- Click Save.

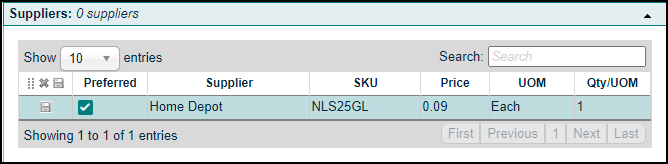
Suppliers
- Click on Suppliers to expand that panel. To learn more, see Adding Suppliers.
- Double-click on the Supplier field to select an option from the pick list.
- Click on the SKU text box and enter the SKU number associated with the part.
- Click on the Price field to enter that supplier's price for the item.
- If necessary, edit the UOM (Unit of Measure) and Qty/UOM (Quantity per Unit of Measure) for this supplier by clicking on those fields.
NOTE When changes are made to a Supplier’s Qty/UoM, that is assigned to an inventory item, the change to the Qty/UoM will be applied to all existing Purchase Orders that have this inventory item as an entry.
Attachments
In this section, you can add any attachments from your computer, the web, or from a Dropbox account.
- Click on Attachments to expand this panel.
- Click the Add Files link.
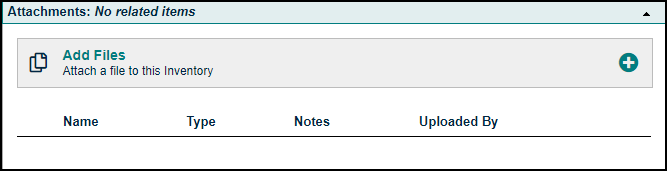
- The File Selection window will display a list of files recently uploaded to the File Library.
-
Use the Search field to search for additional files.
-
Check the box for any file you would like to attach to the inventory item, then click the Add Files button.
-
If the file does not currently exist in the library, click the +New File button to attach the file to the inventory item.
-
In the window that appears, choose the source of the attachment. *Note: If a new image or document is attached to the project, it will also be uploaded to the File Library.
-
Select Choose File to upload a file from your computer.
-
Select Dropbox to link to a file in a Dropbox account.
-
Select URL to enter a link to a document or file on a web page.
-
-
If you have selected the wrong file, click the Remove link and repeat this process to select the correct file.
-
Enter a note or description of the file in the optional Notes field, then click the Add Files button.
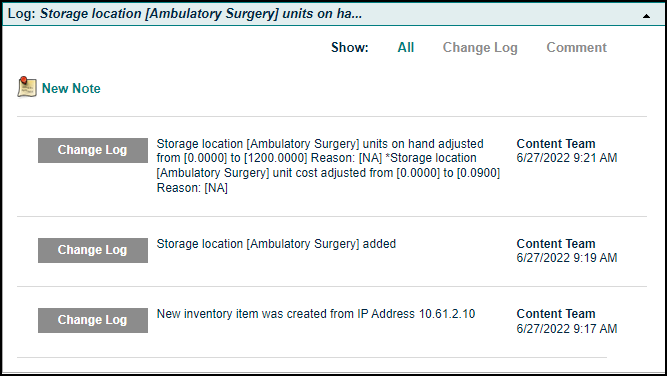
Log
- Click on Log to expand this panel. In this section, you can view any changes or additions made to the template such as status changes, notes, or comments.
- To add a note to the Log, click on New Note.
- Enter the details of the note in the text field, then click Save.
You can also add inventory items by utilizing the Add Ad-Hoc Item feature on a purchase order. See Adding Purchase Orders for more information on this feature.
